Help with the ASP.NET Weblogs
Here's everything you need to know about being a blogger at the ASP.NET Weblogs.
Prepared by Terri Morton, Neudesic
Last updated: February 15, 2016
Overview
We are giving weblogs.asp.net a facelift and rolling out a new blogging engine. Orchard CMS is the new platform, and you can read more about Orchard at http://www.orchardproject.net/.
Orchard Overview
Signing in and Accessing the Admin screen
To access the admin screens for your blog.
- Navigate to your blog
- Click Sign In in the top right corner
-
Enter your username and password, then click the Sign In button.
- Note that your sign in credentials here are separate from those on the rest of the ASP.NET website.
-
Upon successful sign in, your username will appear in the top
right corner. Click the down arrow next to the username and click Dashboard.

- We highly recommend changing your Password from the one we automatically assigned to you.
The Dashboard
Your blog dashboard will look something like the below screenshot:
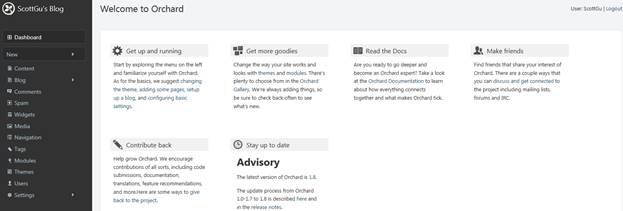
The options you will be using on a regular basis are:
- Blog – New Post
- Comments
Choosing a Theme and Customizing Your Blog
Updating the Title of Your Blog
Your blog title appears in the page header, RSS feed, as well as the H1 and TITLE tags. To change the title of your blog:
- Click Blog in the Dashboard
- Click Blog Properties in the top right-hand corner of the screen
- Update the blog Title (and Description) as desired.
- Press Save
Choosing a Theme
There is currently only one theme available for your blog: The Bootstrap Theme. The styling for this theme can be customized with Bootstrap templates you can find on the internet (free and commercial), and you can add various Orchard modules to customize your blog for your personal needs and taste.
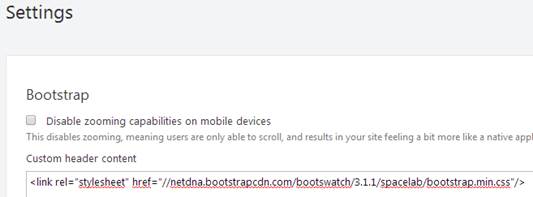
Theme-Specific Options
Clicking Theme Options on the Dashboard brings up a screen with these options:
- Custom header content – Raw HTML content to inject in the template's header, like stylesheets and scripts. This is where the CSS overrides for a custom Bootstrap theme would be added.
- Custom footer content – Raw HTML content to inject in the template's footer, like scripts.
-
Show full summaries – If this is checked, lists of blog posts
(such as those on your blog landing page) will include the full blog post. If
this remains unchecked, just an excerpt of the blog post will be shown. (An
excerpt is defined as the part of the post preceding
<!--more-->in the HTML, and if that's not present then it's the first paragraph of the post.) - Render scripts in header – If this is checked, scripts will be rendered in the header instead of the footer. This will, for example, allow you to use jQuery in HTML widgets.
Adding a Custom Bootstrap Theme
To use a custom Bootstrap theme, you can paste in a link to an external CSS stylesheet in the “Custom header content” on the Theme Options page on the Dashboard. The Bootswatch site (http://bootswatch.com/) has a collection of free Bootstrap themes you might consider choosing for your blog. You can find CDN versions of the Bootswatch CSS files at http://www.bootstrapcdn.com/.
Here’s an example of what to add for the Spacelab theme:
<link rel="stylesheet" href="//netdna.bootstrapcdn.com/bootswatch/3.1.1/spacelab/bootstrap.min.css"/>
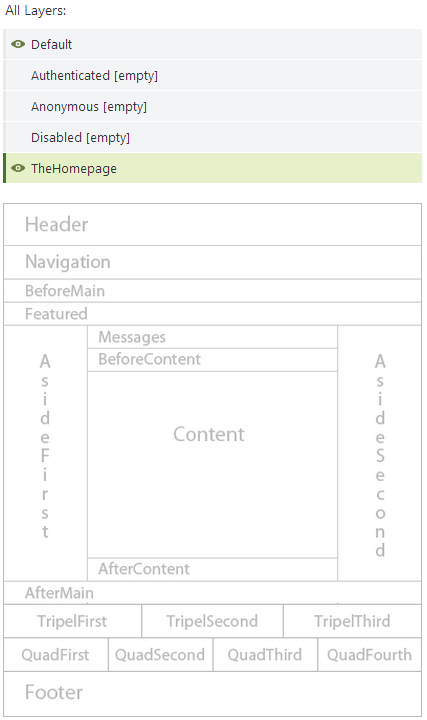
Widgets
This module has the notion of layers. A layer is just a boolean rule on which widget are positioned. If a layer is valid at some point, the widgets assigned to it will be displayed. For instance there is a layer called “TheHomePage” which is true only when a user is on the homepage. Another one called Default is always true. Use it to add a widget on every page. Widgets are of different types based on what they can render. They are also assigned to zone to define their location on the page.
Adding a Tag Cloud
To add a Tag Cloud to your blog:
- Click Widgets – this is where your site layout and elements on the pages is defined
- Choose which Layer to add the tag cloud to (most likely "TheHomepage") from the dropdown
-
Scroll down to the desired Zone to add the tag cloud to. Refer
the schematic on the right side which shows where each zone is placed:
- Click the "Add" button to add a widget to the desired zone.
- On the "Choose A Widget" screen, click "Tag Cloud". This will bring up the “Add Widget” screen.
-
On the Add Widget screen
- Double-check the Zone and Layer
- Choose a Position
-
Type in a Title, such as "Tags"
- Keep the "Check to render the title" checkbox checked
- Type in a Name, such as "TagCloud"
- Leave Buckets as 5, or enter a 1 if you want the tags to all be the same size
- Leave Slug empty
- Press Save
Adding an HTML Widget
Use an HTML widget to add any sort of free-form content you’d like. You could use this to add, for example, a link list. Follow the same steps as Add a Tag Cloud, but instead of choosing the “Tag Cloud” widget, choose “HTML Widget”. Add the desired Title, Name, and Body.
Adding Boilerplate Content after each Blog Post
You can insert an HTML widget into the AfterContent zone to add the same text at the end of every blog post. For example Scott Guthrie adds the following line after every blog post:
P.S. In addition to blogging, I am also now using Twitter for quick updates and to share links. Follow me at: twitter.com/scottgu
The text can be changed at any point, and it will automatically change across all of your post posts.
Adding Blog Archives
To add an Archives module to your blog:
- Click Widgets – this is where your site layout and elements on the pages is defined
- Choose which Layer to add the archive links to (such as "NotAuthentication") from the dropdown
-
Scroll down to the desired Zone to add the archive links to. Refer
the schematic on the right side which shows where each zone is placed:
- Click the "Add" button to add a widget to the desired zone.
- On the "Choose A Widget" screen, click "Blog Archives". This will bring up the “Add Widget” screen.
-
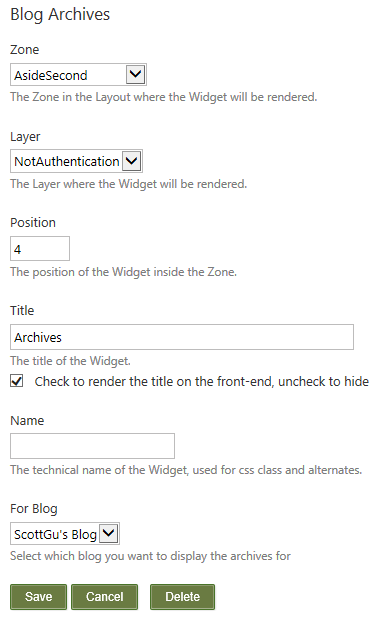
On the Add Widget screen
- Double-check the Zone and Layer
- Choose a Position
-
Type in a Title, such as "Archives"
- Keep the "Check to render the title" checkbox checked
- Type in a Name, such as "BlogArchives", if you are going to target this module for special CSS treatment. Otherwise leave it blank.
- Press Save
Adding Recent Posts
To add links to your recent posts in a sidebar on your blog:
- Click Widgets – this is where your site layout and elements on the pages is defined
- Choose which Layer to add the recent post recent posts to (such as "PostPage") from the dropdown
-
Scroll down to the desired Zone to add the recent posts links. Refer
the schematic on the right side which shows where each zone is placed:
- Click the "Add" button to add a widget to the desired zone.
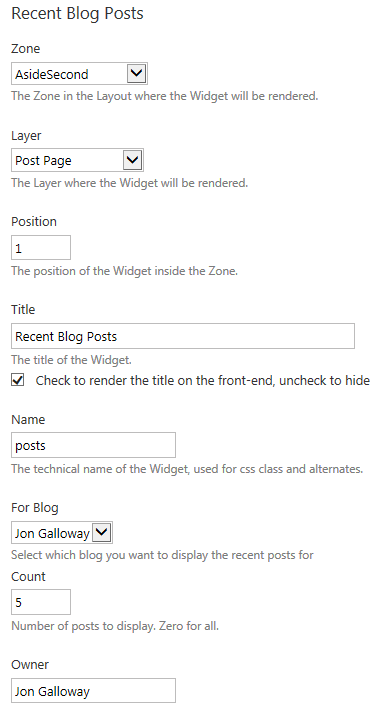
- On the "Choose A Widget" screen, click "Recent Blog Posts". This will bring up the “Add Widget” screen.
-
On the Add Widget screen
- Double-check the Zone and Layer
- Choose a Position
-
Type in a Title, such as "Recent Blog Posts"
- Keep the "Check to render the title" checkbox checked
- Type in a Name, such as "RecentPosts", if you are going to target this module for special CSS treatment. Otherwise leave it blank.
- For Count, enter the number of posts which should be displayed.
- Press Save
Reducing the Font Size of Comments Text
We've had some feedback that the font size of the comments on blog posts is too large. To work around this, you could add something like the following to your Custom header to decrease both the size of the header and the comment text itself:
<style>
p.text{font-size: 14px;}
h2.comment-count{font-size:20px;}
</style>
Check blog setup on Orchard
Your blog content, comments, images, files, description, and About page were all migrated from weblogs.asp.net. However, customizations such as link lists and your Feedburner information was not migrated.
Compare to Current weblogs.asp.net
You should compare your new blog in Orchard against the old one to see if there are elements you still want to carry forward. You should look especially at:
- All Lists (http://weblogs.asp.net/controlpanel/blogs/links.aspx)
-
About My Blog (http://weblogs.asp.net/controlpanel/blogs/AboutOptions.aspx)
- This content was migrated to Orchard. Click the Content item in the Dashboard to find it and update as desired.
-
Manage Blog Files
- This content was migrated to Orchard. Click the Media item in the Dashboard to find the content. Scrolling of the files will be slow when first access, but should be faster upon subsequent visits
Adding Feedburner URL
If you are using Feedburner, this URL was not migrated to your new blog. You will need to set this up. Do this by:
- Click Blog in the Dashboard
-
Click Blog Properties in the top right-hand corner of the screen

-
Type in the Feedburner URL into the “Feed proxy Url” textbox.
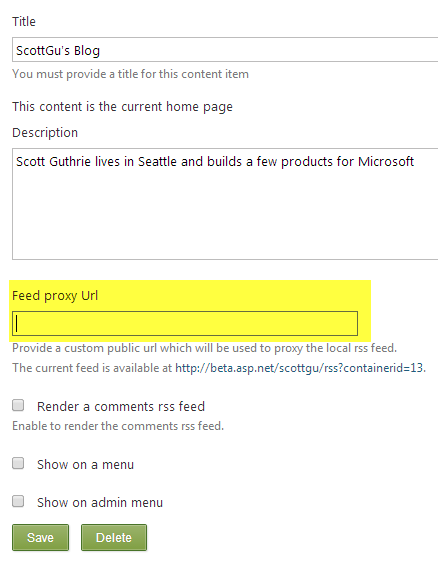
- Note: You can get this value from your old Blog under Syndication Settings (http://weblogs.asp.net/controlpanel/blogs/SyndicationOptions.aspx).
- Press Save
Adding Custom Scripting
If you were inserting anything into the page header or other places in your blog (such as custom scripts for code block formatting), you will need to set this up in your Orchard blog.
Comments to all blog posts are closed
Commenting was disabled on all imported blog posts. You can re-enable comments on any post by:
- Click the Blog option in the Dashboard
- Scroll to find the desired blog post, then click Edit
- Scroll down the blog post page and check the Allow new comments box.
Authoring
Blogging via Orchard UI
Orchard’s documentation on blogging can be found at http://docs.orchardproject.net/Documentation/Adding-a-blog-to-your-site. Click on Blog to list all the blog posts. From there you can edit you Blog’s properties (top right link) if you want to rewrite your blog’s description, define your feedburner url or change the number of posts displayed on the main page.
To create a new post click on New Post.
Title
Can be anything, even international chars.
Permalink
Leave it empty to get a URL created automatically based on the title. You can also alter it afterwards or provide exactly what you want.
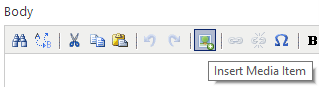
Body
This is where you write the post. There is a Media icon to insert a media item. Click on it even if you don’t have the media in the library yet. A popup will open and let you import and select it in a single UI transaction.
Tags
The existing tags are provided using auto-completion. Use a new one if necessary.
You normally leave the other options as-is.
Publishing
If you click Save then the post will be saved as a draft. Clicking Publish will make the content public. There is a third option, Publish Later, if you need to have the post published at a specific time.
HTML
The Orchard UI provides a rich text editor for creating blog posts. You can use the bold, italics, bullet lists, and other features to format your posts. You can click the HTML icon in the editor to switch to an HTML view of your post, where you can directly update the HTML.
Markdown
The Markdown module is installed by default. To enable Markdown for creating blog posts, on the Dashboard, under Settings, click Markdown. Check the box to “use Markdown to write Blog Post”. This will change the default editor for all blogs posts to Markdown (vs. TinyMCE).
Blogging via LiveWriter
Orchard provides a XML-RPC interface to publish posts remotely. Using LiveWriter gives you additional capabilities, such as saving offline drafts.
To configure the blog in Live Writer, launch the application then in the File menu, click on Options, then Accounts and finally Add. Select “Other Service”, then use your blog URL for the blog address, and your credentials.
From there you can define the tags, set the post date to a future time, and post as draft. Any media will also be automatically saved on Azure Blob Storage and available in the Media library.
See http://docs.orchardproject.net/Documentation/Blogging-with-LiveWriter for more information on how to blog with LiveWriter.
Media
From the dashboard click on Media. All you old files are under the Media folder. You can create new folders as you need them. You can also access this screen directly while editing a Post. The noticeable feature of Media are:
- You can paste an image from the clipboard directly once you are in the Import screen
- You can "Bing Search" images online and import them into your library (you will need an API key for that, it’s free)
- If you select an image then click on Image Editor on the right it will let you crop and resize the image directly
- You can import video files and also external video pointers like YouTube in your media library
Adding New Pages
To add a page, click Content on the Dashboard, then the green “Create New Content” button. Enter the required fields and then Publish Now to save the page and make it immediately available. You can link to this page from the Permalink you created.
Inserting Code Blocks
We strongly recommend enclosing code blocks in <pre> tags, and relying on a client-side syntax highlighter to style the code blocks. Two possibilities are highlight.js and Google Code Prettify.
To use highlight.js, insert the following into "Custom footer content" (under Settings--> Theme Options):
<link rel="stylesheet" href="//cdnjs.cloudflare.com/ajax/libs/highlight.js/8.0/styles/vs.min.css">
<script src="//cdnjs.cloudflare.com/ajax/libs/highlight.js/8.0/highlight.min.js"></script>
<script>
$(document).ready(function() {
  $('pre').each(function(i, e) {hljs.highlightBlock(e)});
});
</script>
To use Google Code Prettify, insert the following into "Custom footer content" (under Settings --> Theme Options):
<link rel="stylesheet" href="//cdnjs.cloudflare.com/ajax/libs/prettify/r298/prettify.min.css">
<script src="//cdnjs.cloudflare.com/ajax/libs/prettify/r298/prettify.min.js"></script>
<script src="//cdnjs.cloudflare.com/ajax/libs/prettify/r298/run_prettify.min.js"></script>
Put code snippets in <pre class="prettyprint">...</pre> or <code class="prettyprint">...</code> and it will automatically be syntax highlighted.
Fixing Styling of Old Code Blocks
If you had been using a plugin or external application to style your code blocks, and your code blocks have a PRE tag on each line, you will find that the code styling is not ideal. For example:
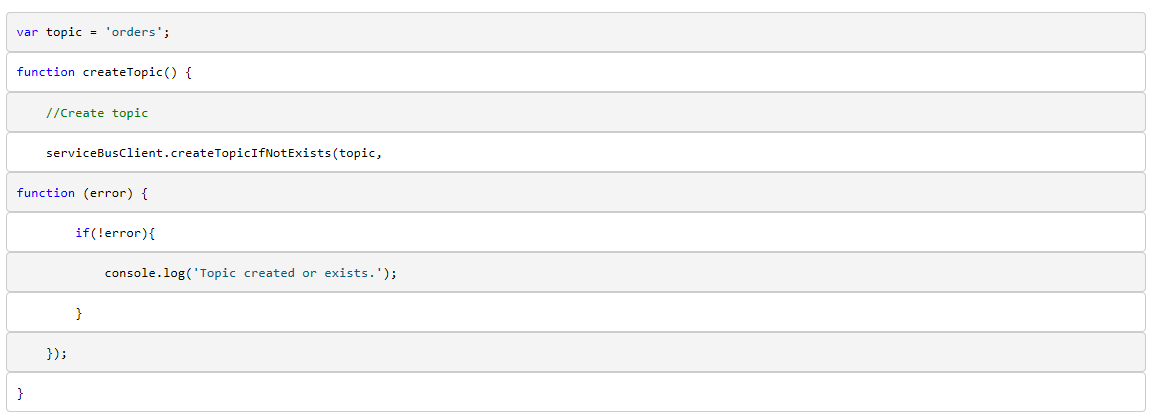
We suggest adding some CSS to your blog to help with the formatting of your code blocks. Under Settings --> Theme Options, in “Custom header content”, you could add:
<style>
div > pre {
border-width: 0px 1px;
border-radius: 0;
padding: 0 1em;
}

div > pre:last-child {
border-bottom-width: 1px;
border-radius: 0;
padding-bottom: 1em;
margin-bottom: 1em;
}

div > pre:first-child {
border-top-width: 1px;
border-radius: 0;
padding-top: 1em;
margin-top: 1em;
}

</style>
Here is what the same code block looks like after applying the additional CSS:

Editing Existing Pages
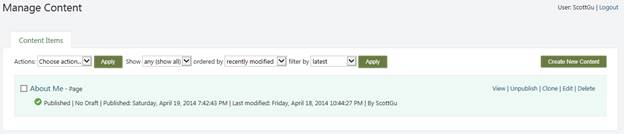
If you had an About page on your blog, we migrated that to Orchard. To edit this page, or any non-post page on your blog, click Content on the Dashboard, find the page under Content Items, then click Edit.
Comments
Settings
Under Settings à Comments you have the ability to require moderation before comments appear on your blog.
You have the option to close comments automatically after a specified number of, and that the value has been imported from your old blog if set. We highly recommend that a value be entered here, as typically after a month or 2 only spammers and spam bots comment on posts.
To receive an email notification when a comment is received on your blog, check the “Notification email” box.

Moderating comments
Click Comments from the Dashboard to bring up the screen to moderate comments. You can filter by approved or pending comments if desired. To run a bulk action on comments, use the checkboxes on the left to select the comments you’d like to process, then select the desired action from the Actions dropdown, and click the Apply action to process.
Dealing with spam
We are making use of ReCaptcha to protect the weblogs against spam.
Miscellaneous
RSS
The RSS feed for your blog can be accessed via http://weblogs.asp.net/[blogname]/RSS. You can add a link for your RSS feed to your navigation menu by following the instructions at Adding a New Page to the Menu. If you are using Feedburner, see Adding Feedburner URL for information on how to set that up.
Email notifications
Email notifications for your blog are disabled by default. You can take action on the comment directly from the email.
Sitemap
Note that your blog has a sitemap XML file available at [blog URL]/sitemap.xml. You can submit this via Google Webmaster tools or other places where you’d like to ensure that your content is picked up.
Ping service
We do not provide a ping service at this time.
Setting up a new Username for blogging only
Your username is set up as the Administrator of your blog. Once you are happy with the setup of your blog, you may want to create a separate user as an Editor. The reasons for this are two-fold:
- You are less likely to make an accidental change to your blog
- You will simplify the Dashboard experience as fewer options will be present
What is the "super" user?
The site-wide "super" user is an administrative account which cannot be removed or changed. It allows us administrator access to your blog, for the purposes of site administration and maintenance.
Adding a New Page to the Menu
Click Navigation in the Dashboard to update your navigation
menu. This page manages the main menu. If you create custom pages then you can
add them here, or even existing blog posts and external links. Links are
organized using drag and drop.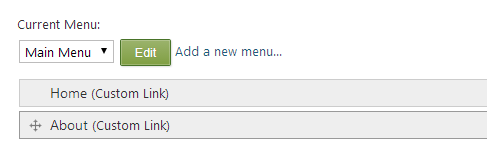
Analytics / Page Views
Bloggers can add third party tracking scripts (such as Google Analytics). Something like this will give you better analytics than a simple "views" count than the old Community Server platform gave you. These pages which should help you get Google Analytics set up:
- https://support.google.com/analytics/?hl=en#topic=3544906
- http://www.wikihow.com/Add-Google-Analytics-to-Blogger
A good place for the tracking code is in the Default layer, in the Footer zone. Alternately it could be added in "Custom footer content" in the Theme Options.
How to get help
Site owners are:
- ASP.NET: Chris Sfanos, Microsoft
For technical assistance on weblogs.asp.net, please contact Terri Morton, with the site owner CC’ed.
Additionally, a Jabbr has been set up at https://jabbr.net/#/rooms/weblogsaspnet where any questions can be answered by either the site developers/administrators or other bloggers.
Please post any feedback and suggestions to the ASP.NET Uservoice.